An Easy Solution to a Common Issue
If you do design work, you’ve probably been in a situation where you had a raster image, like a jpeg or png file, that you needed in a vector format. Maybe it’s a logo where a client wanted to make a large banner or sign but no longer had the original vector files. Regardless, if it’s something you may need to significantly enlarge without losing resolution, it needs to be a vector file.
Following is a pretty simple 6 step process for converting your raster image to a vector file. These instructions are specific to Adobe CS5 but the functionality is pretty much the same for all the recent version of Adobe Creative Suite. We’re using images from a recent client logo we designed to illustrate the process.
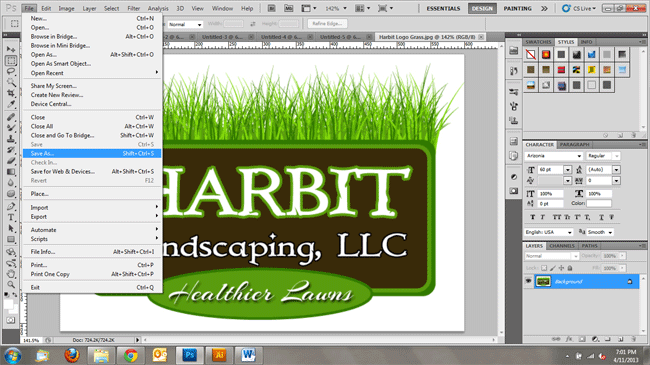
Step 1: Clean it Up In Photoshop
Depending on the size or resolution, you may need to do a little cleanup or enhancement on your image in Photoshop before you try and convert it. It’s probably a good idea to enlarge any really small files so they’re at least 2-3 inches wide or tall (depending on the image orientation). It may also make sense to clean and smooth the edges if the image was poor quality or low resolution. When you’re done with this, simply save the touched up image as a 300 DPI jpeg or png file using the “Save As” option in your “File” menu.
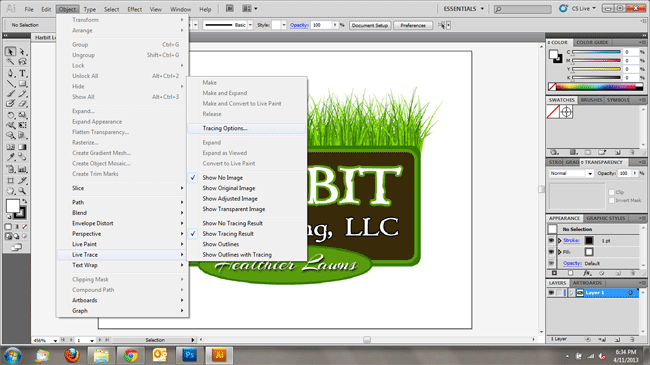
Step 2: Import Into Illustrator and Open Live Trace
To get started in Illustrator, simply select the image you saved and open it with Adobe Illustrator. Once your file is open, simply click on the image using your “Selection Tool”. Once the image is selected, move your cursor up and click “Object” from the menu bar so the drop down appears then scroll down to “Live Trace” and you’ll see “Tracing Options” from the additional menu. It should look something like this.
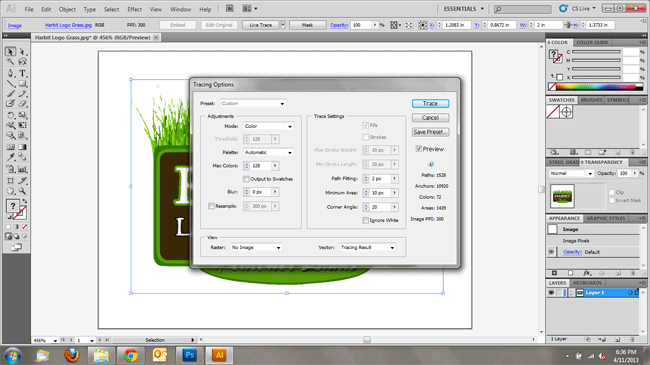
Step 3: Set Tracing Options and Trace
Once you select “Tracing Options” from the menu options a new box will open up that will allow you to set your tracing options and preview the traced image. Be sure to make the proper selection for black and white or color and adjust your other settings accordingly. It’s important to keep in mind that the number of colors you use to trace the image can have a pretty significant impact on the crispness and clarity of the image. For this reason, you’ll want to click the “Preview” option (see button on right side of the box in the image below) and preview several color options to get the best clarity. Once you find the one you want, just click the “Trace” button on the top right and Illustrator will do the rest.
Step 4: Proceed to Live Paint
If you’re going to want to make changes to any of the vector paths or colors in the image, you’ll need to do a “Live Paint” as well. You can easily do this by making sure the image is selected using your “Selection Tool” and then clicking “Object” on the menu bar again. This time you scroll down and hover over “Live Paint” to expand the menu. It should look something like the image below.
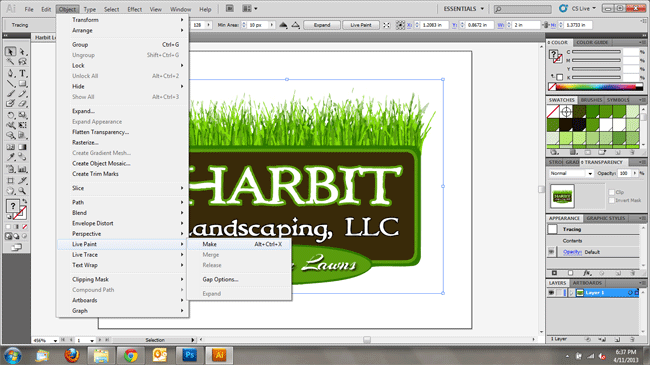
Since the default options are usually all you’ll need, you can probably skip any additional settings and just click the “Make” option on the menu. Again, Illustrator will complete the process.
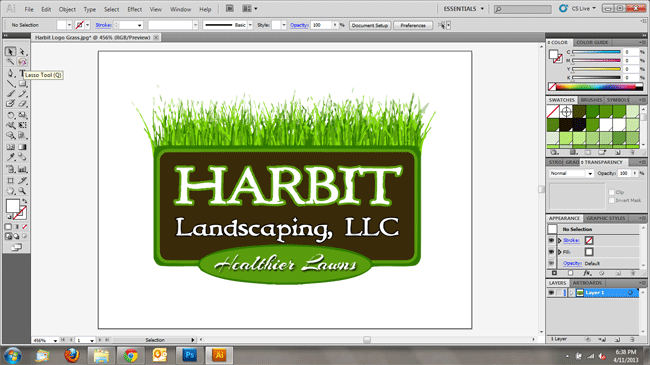
Step 5: Delete Background Fill
Once the “Live Paint” is completed, you can delete any background color (usually white) so all that remains is the image itself. To do this, select your “Lasso Tool” as shown in the image below.
Using your “Lasso Tool”, select a small piece of the background fill and complete a lasso circle to highlight the background area. This should give you a result something like this image.
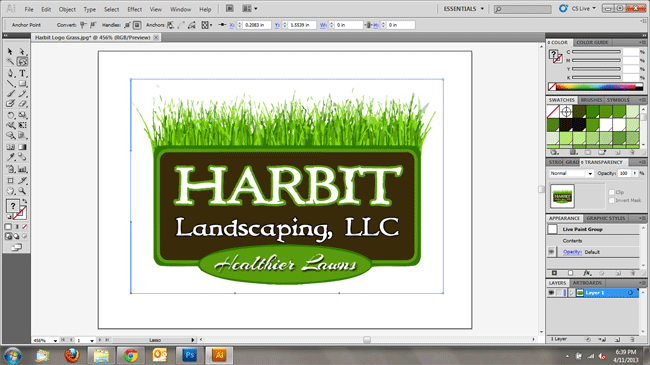
Once you have the area highlighted, just click the “Delete” button on your keyboard. You can repeat this process, as needed, if you have several unconnected areas of background fill.
Step 6: Save File and Exit
As far as the conversion process goes, that’s it! Since you’ve fully converted the file you can now re-size it or edit colors as required. You can also export it or save it to a variety of file types. At the very least, you’ll want to save it as an ai or eps file so you can edit it however you want in the future as a vector file.
8 Comments
Auto-tracing isn’t good solution if you want print your logo or design. You must manually vectorize image if you need quality results.
http://www.vectorizeimages.com/
February 4th, 2014 at 12:20 pm
When done properly, auto tracing can produce a very high quality image suitable for even large scale printing. While we agree that an original vector image is preferred, it’s not a requirement for a high quality print.
February 11th, 2014 at 2:23 pm
I have Illustrator CS. It doesn’t have Live Trace. Is there another solution for me? Maybe a plugin or something?
February 11th, 2015 at 4:48 pm
If you have Illustrator CS6 Live Trace has been replaced by Image Trace. It performs basically the same functions but is supposed to be a little more intuitive to use.
February 11th, 2015 at 8:18 pm
John,
I have Illustrator CS. So I don’t have Image Trace either. I thought maybe there was a way to do it in CS. I downloaded a freeware product called WinTopo. Doesn’t look promising so far though.
February 12th, 2015 at 7:57 am
Thanks so much for this method! Still kind of new to Adobe but I’ve tried the steps and it’s exciting to not be limited to one program or another.
One quick question, on Step 5: “Using your “Lasso Tool”, select a small piece of the background fill and complete a lasso circle to highlight the background area.”
I’m not really sure what this means or how to select just a small piece of the background. After converting to Live Paint all I can do is select the whole image. Real newbie question I know but please help. Thanks again, this was awesome!
May 29th, 2015 at 2:44 am
*Update – Actually I found one way. Make sure when in Live Trace you click on the “Ignore White” checkbox. Then there will be no white BG. John, if you could explain your method though I would greatly appreciate it. Thanks
May 29th, 2015 at 5:51 am
Hey Jeremy. As you said, you should click Ignore White checkbox when doing Live Trace. This will still leave some residual anchor points when you perform Live Paint. After you perform Live Paint, you can double click the image to get into Layer mode for the Live paint group. Then, using the lasso tool (it looks like a small lasso with a cursor in it) you can circle around any of what should be the white areas to highlight stray anchor points. Once highlighted you can simply delete them. Once you clean up stray anchor points, just double click anywhere outside the artboard and you’ll return to normal screen mode.
May 29th, 2015 at 10:39 am